


My daughter is two going on fifteen.
She loves to wear pretty dresses, walk around the house in mommy’s heels, use her special make-up brush on her cheeks in the morning and accessorize with scarves & necklaces (a habit she comes by honestly). She has the attitude to go along with all of this too (she comes by that honestly as well).


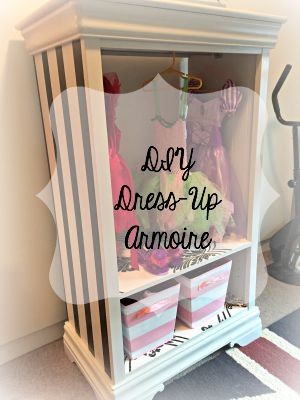
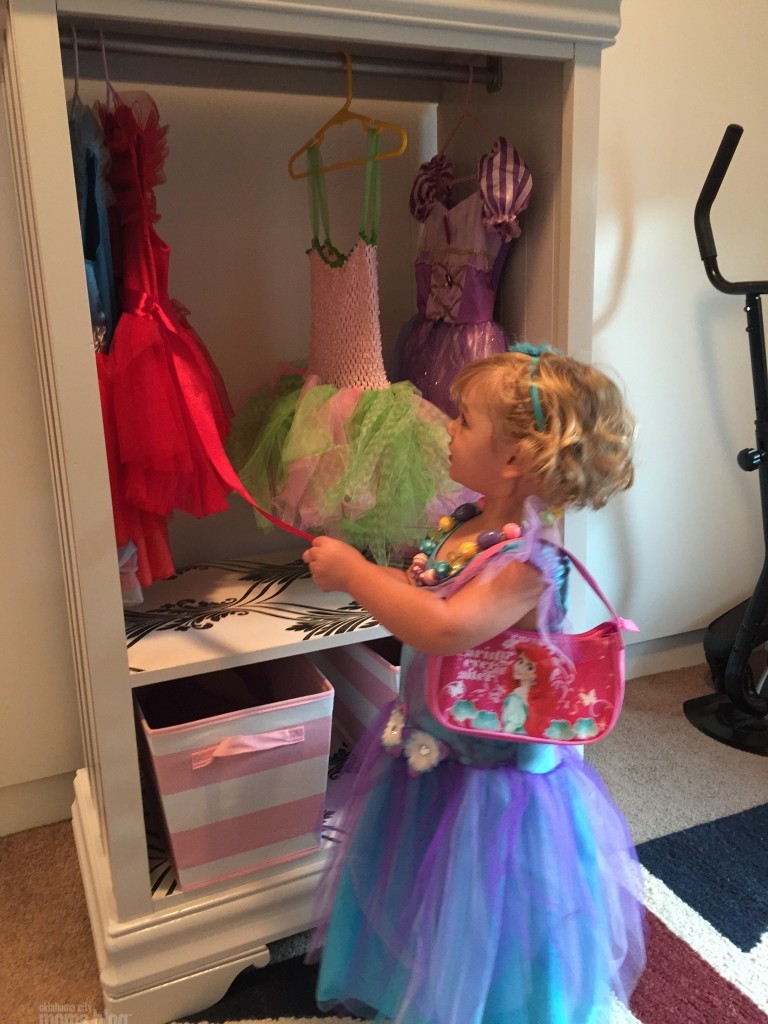
For her second birthday, I wanted to get her a dress-up armoire. However, after a Google search for some options, I quickly realized that it was going to cost more money than I wanted to spend. So, of course, I thought I’d try a DIY project instead!
For this project, I scored a $20 TV cabinet on Craig’s List! Twenty bucks…a fraction of the cost of what I saw online! While this cabinet was in decent condition, it needed a little work to be up to par for the vision I had in my head.
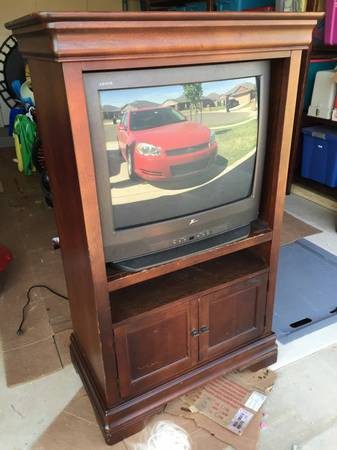
First, I removed the doors and hardware from the bottom section. Second, I removed the shelf that the previous owners used to hold the TV. I was left with a shell of a cabinet to work with. I loved the basic, simple look of it and the fact that it was the perfect size for my daughter!
At this point, I gave the whole cabinet a light sanding. I didn’t spend too much time on this part…just enough to rough up the surface a little bit. After wiping the dust off I gave it a light coat of primer. Again, I didn’t spend too much time on this part. The primer doesn’t have to look pretty; it just needs to cover the all surfaces.
When it came time to paint I chose to use a color that I already had on hand from a previous project. I was conflicted about what color to paint it so I made it easy on myself and just used whatever color of paint I had enough of in the garage. I ended up loving the look of the light gray. It’s neutral and will go with any kind of décor, which means it will be able to work in my daughter’s room no matter how we change it up in the future.
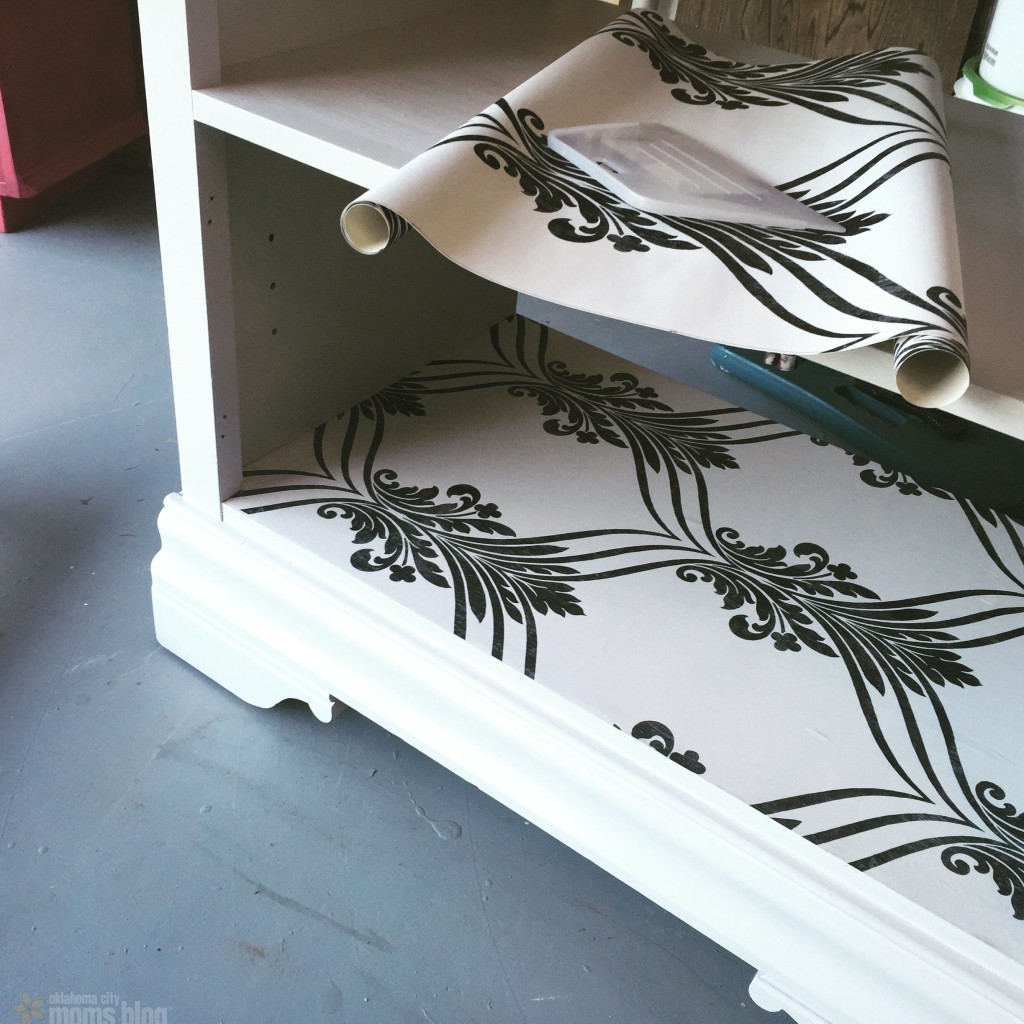
To make it a bit more fun, I added a pop of pattern with wallpaper. This was something I had on hand from a previous project too. The wallpaper I used was extremely easy to install. I cut it down to size and soaked it in water for about 30 seconds. Then I laid it down on the surface and used a scraper to smooth it out and get rid of the air bubbles. I had to let it dry for a while after that. What’s with the humidity during Oklahoma summers? My projects always take FOREVER to dry this time of year!
Once the wallpaper was on, I decided to add some vertical black stripes to the outside. For this part, I used my painter’s tape and eyeballed the stripes. I was feeling lazy and it was SUPER hot out in my garage. I had no desire to spend time making sure everything was perfectly spaced. The stripes aren’t perfect but I think they look great!

Once the stripes were taped off, I used the light gray color to seal the edges before filling the stripes in with black paint. This is the best way I’ve found to get crisp lines when painting stripes. I peeled off the tape before the final coat of black paint was dry. I finished it off with two coats of Polycrylic.
All that was left to do at this point was install a bar for the hangers. I just happened to have one in my junk pile. Sometimes I find random things and hang on to them in case it ever comes in handy in the future. Many times my junk goes unused but, this time, it worked out well for me! A wooden dowel from the hardware store would have worked just a well though.
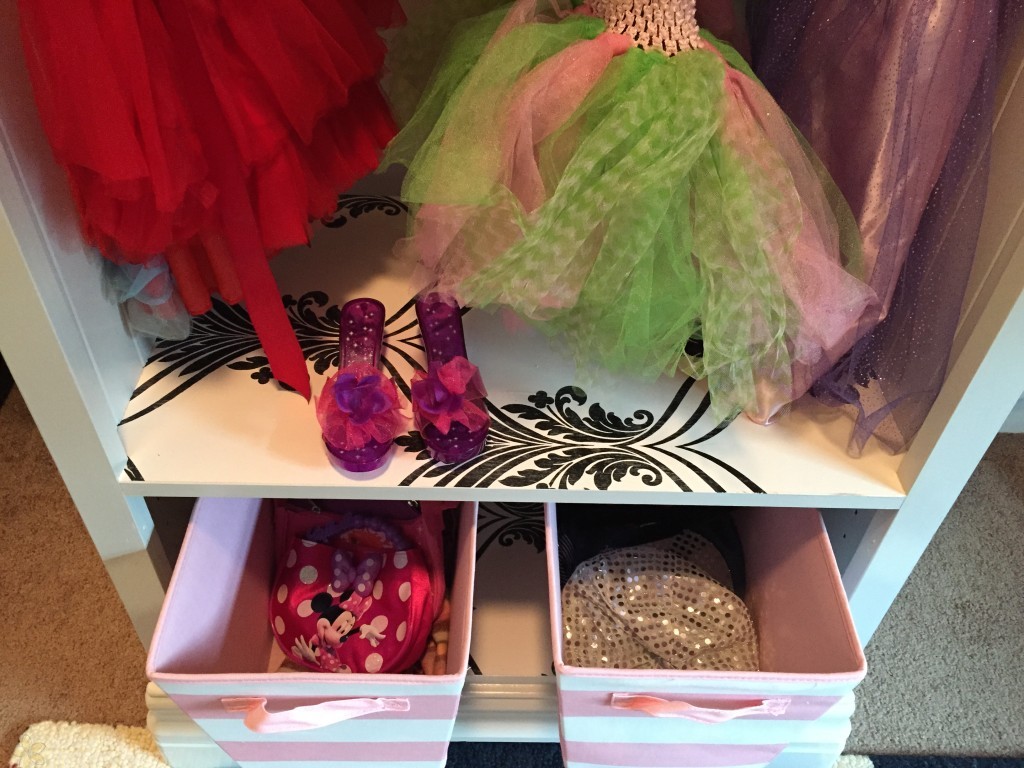
I also bought some cute pink striped baskets from Target to use on the bottom of the cabinet. These now hold scarves, purses, & hats.
Once the hanging bar was installed and the baskets were in place, my project was finished. This project cost me $40 total. The cabinet was $20 and the baskets were $10 each. All the other supplies were things I already had on hand. It was also very easy to do and didn’t require any power tools….just some elbow grease and a paint brush.

If you have a sassy little girl who likes dress-up as much as my daughter, this is a great project to take on. There are many nice options for purchase but making your own saves a lot of money and allows for customization. I decided to keep mine fairly simple but you could easily add hooks to hang purses & scarves or attach a mirror to the side.
I love seeing my daughter play dress-up! It’s also funny to see her get her brother involved or try to put make-up on her daddy. One of these days I’ll have my camera ready at one of those opportune times to get a good pic for the sake of future embarrassment!


